Posts Tagged ‘3d graphics’

Computer animation project

One of the fun results from my computer graphics class last semester was our computer animation project. The assignment was to model the firing of a cannon, including the cannon recoil and the projectile’s parabolic trajectory. The end goal was to use this model to drive a 3D animation.

I worked with 2 other group members, and in all I spent 54 hours in group meetings and coding individually. The project resulted in about 4000 lines of code in 34 Java files.[1]

Physics modeling

For each frame of our animation, we make slight changes to the position of each object on screen. These small changes are based on simple physics calculations.

For example, for a wheel to roll to the left, it needs to both rotate counter-clockwise and move to the left. The angle of rotation \Delta\theta is related to the shift to the left \Delta s by the following equation:

\Delta s=r\Delta\theta

where r is the radius of the wheel.

Firing the projectile gives the projectile some initial velocity. This velocity can be used to compute a change in position for the projectile. The velocity changes over time due to acceleration due to gravity.

2D animation

First, we produced a 2D animation of this model. This involved several steps:

  1. Read in 3 objects : the projectile, and the wheel and the barrel which make up the cannon. These objects can be drawn on-screen in a certain order so the layering appears correct
  2. Move them to their initial position.
  3. For each screen refresh, update the positions of the objects based on the equations.

Initially, the projectile has 0 velocity, so item #3 above really means that nothing will change in each screen refresh. As soon as the user presses the fire key, the projectile is given a fixed amount of velocity (and the wheel is given an amount of recoil velocity).

3D animation

Making the 3D animation was the more challenging part of the project. While the 2D animation was written in about 10 hours, the 3D animation took 44 hours to write, including a 13 hour rabbit trail. I spent about 13 hours working on a version that ended up not working.

The 3D animation extends the work of the 2D animation. Instead of a 2D wheel, barrel, and projectile, we now have 3D objects. These objects are first generated and then stored in .dat files. There are now 6 objects: the ground, 2 wheels, the axle, the barrel, and the projectile.

Based on the source code from our textbook, the 3D objects are put into a scene which can be viewed from different perspectives. We added code to rotate and move individual objects based on the amounts specified by our physics model.

Here is a demonstration:

The video demonstrates two methods of rendering that our 3D cannon animation supports. The first is z-buffering, and the second is hidden line elimination. These two methods are described in my first post about computer graphics class.


[1] This is a raw count, produced by doing wc -l *.java. Not all 4000 lines are original code for this project. Some of this code was first implemented in our textbook,  Computer Graphics for Java Programmers, 2nd ed., by Ammeraal and Zhang. There are also 6 Java programs for generating the data files for the various on-screen objects. These Java programs have a lot of code duplication.

What I learned from computer graphics class

Besides my course in evolutionary computing, which I learned a lot from, last semester I took a class in computer graphics. In this class, I learned about different aspects of computer graphics, including modeling and rendering objects to a screen.

I definitely appreciated how computer graphics class built upon knowledge that I had already gained in previous subject areas:

  • Geometry
  • Linear algebra
  • Java programming

Modeling 3D objects

We modeled 3D objects as collections of points in a 3D space. Each object has a number of faces, where a face is a collection of points (a polygon) that make up a face of that object. Each face must be flat. So, for example, a cylinder would be made up of a finite number of long thin faces.

Rendering 3D objects

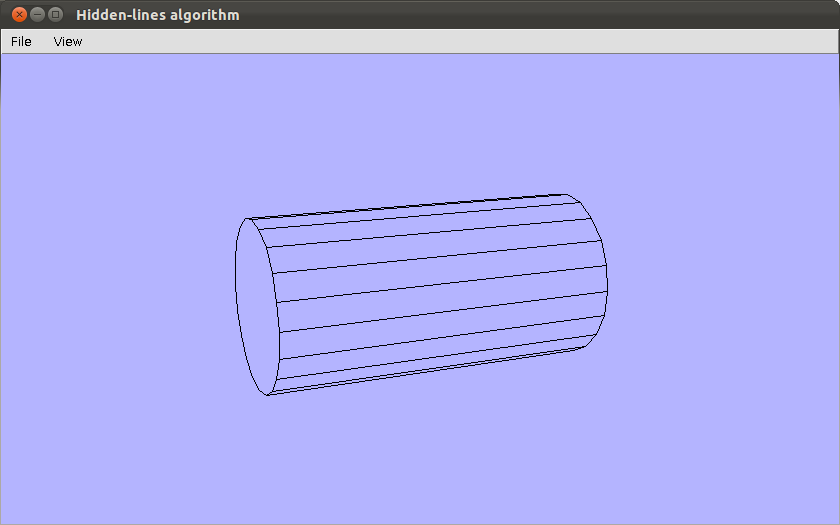
A simple rendering is to draw a line around the edges of each face in the object. This would be called wire-frame rendering. A slightly more complex rendering is to ensure that lines are hidden if a face falls in front of that line. This is called hidden-line elimination. A cylinder is displayed here as rendered with hidden line elimination:

Cylinder displayed with hidden line elimination

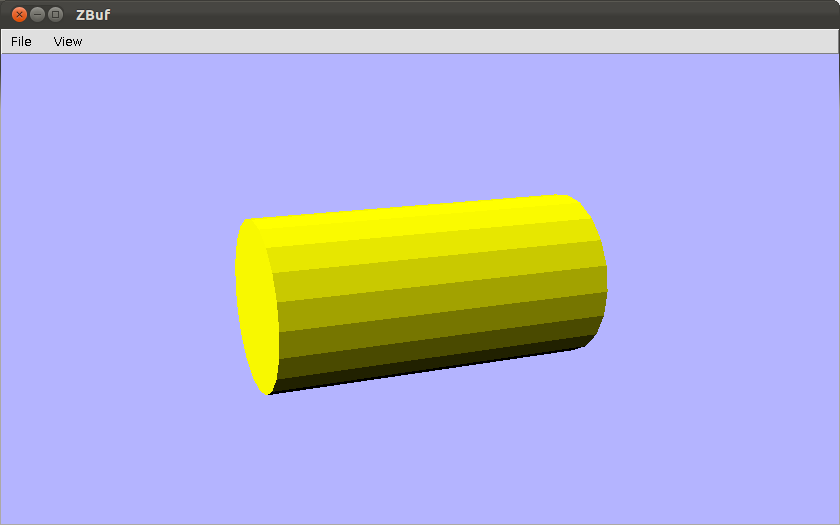
A more realistic rendering gives a color to each face and fills it in. The face’s color can be shaded according to the direction the face makes with a light source. One simple method of rendering these shaded faces is called z-buffering. Here’s a screenshot of a z-buffer rendering of the same cylinder:

Cylinder drawn using z-buffer

3D graphics on Linux

As I mentioned in my post about free software, one of the problems with my current Ubuntu installation is my use of a non-free graphics driver. I would prefer to find a way to use free software and still have some hardware acceleration support, e.g. for compiz and for video playback. (I found a good tutorial on how to fix video tearing.)

As a side note, I have a free graphics driver with hardware acceleration working on my Eee 900. This is mainly because the eee pc has Intel integrated graphics. On the other hand, its performance is nothing to write home about.

The target system is an HP Compaq dc7900, with an ATI Radeon HD 2400 XT (RV610). I am currently running Ubuntu Linux 10.04 LTS with the fglrx driver.

Testing your existing setup

The old way to check for hardware acceleration was the following:

$ glxinfo | grep rendering
 direct rendering: Yes

where a Yes means you do have rendering. However, I learned that a system can answer yes even if it is not using hardware acceleration. The proper command is:

$ glxinfo | grep OpenGL
 OpenGL vendor string: Tungsten Graphics, Inc
 OpenGL renderer string: Mesa DRI Intel(R) 915GM
GEM 20100330 DEVELOPMENT x86/MMX/SSE2
 OpenGL version string: 1.4 Mesa 7.10.2
 OpenGL extensions:

The item of interest is the “renderer string.” If it says “Software rasterizer,” then your system is emulating OpenGL instead of using hardware acceleration. Here is some more documentation on how to check your setup using glxinfo.

Some definitions

  • OpenGL is a standard specification for writing applications that produce 2D and 3D computer graphics. Basically, it is an API.
  • Mesa 3D is an open source implementation of OpenGL, providing the library that applications can call into.
  • Direct rendering interface (DRI) are drivers that Mesa uses to translate OpenGL function calls into GPU-instructions.

When the DRI is present, this would constitute hardware acceleration. It has a userspace component and a kernel space component, which is the direct rendering manager (DRM)

The “driver” that is specified in xorg.conf is actually a relatively basic driver that performs the 2D tasks, including compositing and video acceleration. All 3D calls are passed on to Mesa. See the section about DDX (Display Driver for X) in Linux Graphics Driver Stack Explained.

Kernel Mode Setting (KMS) is the notion that the code to set the video card’s mode is moved into the kernel. The mode is the color depth and resolution of a monitor. Previously, the mode setting code resided in the X server. In the new scheme, it resides in the kernel. This provides the following advantages, as given in Debian 6 Release Notes:

  • More reliable suspend and resume
  • Ability to use graphics devices without X
  • Faster VT switch
  • Native mode text console