Archive for the ‘Linux’ Category

Yet more website tweaks

Improve server response time

In my original post about hosting my own blog, I mentioned that Google PageSpeed Insights was complaining about server response time. After some research, I realized that my home page was quite large. It was over 1 MB, mainly because of a particular post which contained some large images. (I was complaining about the way graphics are configured on Windows, and included some large screenshots.) The fix was two parts. First, I cropped two of the screenshots to bring the size down a bit more. Second, I added the “More” tag, which makes users click a “Continue reading” link from the home page if they want to see the whole post.

If you want to measure the page load size on your own blog, clear your browser cache, then open up developer tools. Reload the page. On the “Network” tab (“Net” in Firebug), there is a summary of the number of HTTP requests, the amount of data downloaded, and the time it took.

Add LaTeX and YouTube to WordPress

Recently I found another post that needed some special care. In 2012 I posted about my computer animation project and included a YouTube video and some math equations. These used features unique to WordPress.com: by simply pasting the link, it will embed a YouTube video, and by using a special tag, you can include math equations using the popular typesetting language LaTeX. One way to bring these into my WordPress.org blog would be to use WordPress.com’s plugin Jetpack. Jetpack brings a lot of WordPress.com features to WordPress.org, but I didn’t want all of them. Instead, I opted for two small plugins, WP-Latex and YouTube Embed Plus.

For people setting up their own blog, I’d recommend either Jetpack or a combination of smaller plugins to enable these features.

Add tracking code to static content

By using a combination of WordPress, Piwik, and the WP-Piwik plugin, I’m able to track analytics on all the pages of my blog. However, my site is more than my blog, and I wanted to track visits to my static pages, namely my portfolio and my Post Voting app. One idea is to paste in the tracking code and just have it be versioned like my other static content. I see two downsides to this:

  1. The tracking code could change, and then I’d be updating it across all the pages, polluting the version history and causing a mess of confusion.
  2. The tracker would track my own visits that happen as I do web development on the various pages.

The solution is to use Server Side Includes to include the tracking code. This addresses the two concerns above:

  1. The tracking code is stored as a separate file, so it can be versioned independently.
  2. The include can be conditional on whether this is a development or production server.

As a further feature, I wanted the tracking code source file to be hidden from anybody that tries to access it directly. (Not really essential, but it helps me learn about configuring .htaccess)

Running into snags

I ran into two snags that helped me learn a lot more than I had originally intended. First, while trying to get the syntax of the conditional include right, I was reading the Apache documentation. However, I failed to realize that my development machine had Apache 2.2, and my web host has Apache 2.4. I was reading the documentation for Apache 2.4 ap_expr syntax. I was stumped as to why the code worked on my web host, but gave an Invalid expression error on my development machine. The solution was to create a new virtual machine using the same version of Apache as my web host. The lesson learned was to ensure that development and production environments are as close in configuration as possible.

The second snag happened when I restricted access to my tracking code piwik.html using .htaccess. I realized that this also restricted mod_include from including it! The solution came from reading the Apache 2.4 documentation for mod_rewrite. The NS flag prevents a rule from applying to an internal subrequest.

The solution

In portfolio and postvoting folders, I renamed index.html to index.shtml. The include source code which follows was added to each page:

<!--#if expr="%{SERVER_NAME} == 'bobbyratliff.nfshost.com'" -->
<!--#include virtual="piwik.html" -->
<!--#endif -->

You can view the current version of the Piwik tracking code on github.

The .htaccess file has the following line added to it:

RewriteRule ^/?piwik.html$ - [F,L,NS]

That’s all there is to it. Just use the static deploy method and your site will be updated.

Website maintenance and tweaks

Keeping WordPress up to date

I originally installed WordPress using Subversion. This provides a really easy way for me to update WordPress:

svn switch http://core.svn.wordpress.org/tags/3.4.1

Replace 3.4.1 with the latest version number. Then I visit the admin panel of the blog and it will redirects me to perform any necessary database upgrades.

Use .htaccess to prevent access to the .svn directory:

# Prevent access to .svn directory
# From http://codex.wordpress.org/Installing/Updating_WordPress_with_Subversion
RewriteEngine On
RewriteRule ^(.*/)?\.svn/ - [F,L]
ErrorDocument 403 "Access Forbidden"

Compression

I’ve learned that content can be categorized into static content and dynamic content. There is an Apache module, mod_deflate, that can compress both types of content seamlessly. It only requires a configuration change in .htaccess, and no changes will need to be made to the application. However, it is inefficient because it recompresses the same content every time someone requests it. For this reason, my web host does not support mod_deflate. Instead, they recommend different tactics for each type of content.

On my blog, an example of dynamic content is the home page, http://www.rratliff.com/. This test or this test can test whether the home page is compressed. At time of writing, I have not found a good way to compress dynamic content.

On my blog, there are several static content files that are typically requested. For example, the CSS and JS files that WordPress includes in every page. Google Page Speed Insights is the a tool that tests compression of every resource needed for loading my blog’s home page, both the dynamic and static pages. I’m looking for a reliable way to compress the static content files that Google Page Speed Insights finds.

Deploying static content

I now have two sections of static content on my website, my Post Voting App and my Portfolio. I’ve adopted a simple solution to keep these sections up to date. Each section is maintained in a github repository. I have a matching repository on my own computer where I make changes, commit, and then push to the github repository. Then, to update the content on my website, I SSH to the host, cd to the directory, and do a git pull.

I reuse the .htaccess code above in order to prevent access to the .git subdirectory. See the .htaccess file for an example.

Backups

I created two scripts to backup the files and the database in my NearlyFreeSpeech site. The scripts aren’t fancy, they just contain one command each.

For the database, I created a non-privileged backup user who has permissions necessary to do a mysqldump on all the tables in my database. Here’s the gist of it. (It should be all one line. Lines wrapped for display purposes.)

ssh user@host mysqldump --user=nonprivilegeduser 
    --password=password --host=mysql_host 
    --all-databases | gzip > backup-file-name-$(date +%Y%m%d).sql.gz

Just change the underlined parts. The $(date) thing creates a filename like this:

backup-file-name-20131029.sql.gz

For the files, I use rsync with the options -aAXE --delete.

SSD benchmarks

I’ve recently purchased an SSD upgrade for my Asus Eee PC 900 (XP). It will be a size upgrade (from 16 GB to 32 GB) and it should be a speed upgrade as well. I decided to do a benchmark of every SSD I currently own in order to compare their performance.

TL;DR: Jump to the results

The contenders

I have four SSDs. They vary in size, and as we’ll find out, speed.

Short name Size Disk ID Comments
Samsung internal 8 GB SanDisk iSSD P4
64BG external 64 GB M4-CT064 M4SSD2 Crucial M4, connected by USB 3.0
Eee PC internal 16 GB ASUS-PHISON SSD
New Eee PC internal 32 GB STT_RPM32GLSE Super Talent, purchased here

Getting the benchmarks

First, I had to choose a benchmark tool that would benchmark both the internal SSDs (Actually the Samsung internal is soldered onto the motherboard) and the external SSDs. I chose a familiar tool, the Disk Utility in Ubuntu 12.04.3. I used the old version after running into this bug on Disk Utility in newer versions of Ubuntu.

This benchmark tool works well for read benchmarks, but for write benchmarks it has a quirk of wanting the disk to have no partition table. Yep, you’ll have to delete all your partitions as well as the partition table. When I benchmarked the Samsung internal, I had to first backup the disk with Clonezilla, then restore the disk after the benchmark completed.

I benchmarked the first three drives listed above, then upgraded the Eee PC’s drive in order to benchmark it.

Upgrading the Eee PC 900

I upgraded the SSD following the recommendation of this article. So before installing the new SSD, I updated the BIOS. This was fairly straightforward. I went to the ASUS support page for the Eee PC 900 XP and downloaded BIOS version 1006. I unzipped the file, and in order to get it to install, I had to rename the file to 900.ROM. I copied 900.ROM to a 256 MB USB stick, and inserted it in the left USB port. Then, when the POST screen showed, I pressed Alt+F2 and got the BIOS update screen. Pretty cool.

Results and conclusion

Read and write benchmarks for solid state disks
Device Average Read Rate (Mb/s) Average Write Rate (Mb/s) Average Access Time (ms)
Samsung internal 137.0 21.2 0.4
64GB external 200.1 51.7 0.2
Eee PC internal 31.3 9.9 0.7
New Eee PC internal 135.8 23.7 0.5

In conclusion, the Eee PC has enjoyed a decent upgrade. Twice the storage space, and a SSD fast enough to compete with the Samsung internal SSD soldered onto the motherboard!

USB hardware smackdown

Continuing in the vein of my USB 3.0 benchmarks, I’d like to compare the USB 2.0 controller on my Samsung Chronos Series 7 NP700Z3A laptop (purchased in 2012) and my HP Compaq dc7900 CMT desktop (purchased in 2009).

My two flash drives for testing are the SanDisk Cruzer Red and the Kingston DataTraveler 111.

For both machines, I ran Ubuntu 12.04.3 amd64 desktop edition, and used Disk Utility (3.0.2) to perform a read-write benchmark.

Samsung Chronos Series 7 NP700Z3A

Average and maximum read rate for a read-write benchmark on the Samsung laptop
Device and port Maximum Read Rate (MB/s) Average Read Rate (MB/s)
Cruzer in USB 2 port 23.1 22.6
DataTraveler in USB 2 port 33.8 30.3

HP Compaq dc7900 CMT

Average and maximum read rate for a read-write benchmark on the HP desktop
Device and port Maximum Read Rate (MB/s) Average Read Rate (MB/s)
Cruzer in USB 2 port 24.8 24.3
DataTraveler in USB 2 port 40.5 39.4

My conclusion is that the HP desktop has a faster USB 2 controller than the Samsung by 7 MB/s or so, but this is only evident when comparing performance of the Kingston.

3D graphics on Linux

As I mentioned in my post about free software, one of the problems with my current Ubuntu installation is my use of a non-free graphics driver. I would prefer to find a way to use free software and still have some hardware acceleration support, e.g. for compiz and for video playback. (I found a good tutorial on how to fix video tearing.)

As a side note, I have a free graphics driver with hardware acceleration working on my Eee 900. This is mainly because the eee pc has Intel integrated graphics. On the other hand, its performance is nothing to write home about.

The target system is an HP Compaq dc7900, with an ATI Radeon HD 2400 XT (RV610). I am currently running Ubuntu Linux 10.04 LTS with the fglrx driver.

Testing your existing setup

The old way to check for hardware acceleration was the following:

$ glxinfo | grep rendering
 direct rendering: Yes

where a Yes means you do have rendering. However, I learned that a system can answer yes even if it is not using hardware acceleration. The proper command is:

$ glxinfo | grep OpenGL
 OpenGL vendor string: Tungsten Graphics, Inc
 OpenGL renderer string: Mesa DRI Intel(R) 915GM
GEM 20100330 DEVELOPMENT x86/MMX/SSE2
 OpenGL version string: 1.4 Mesa 7.10.2
 OpenGL extensions:

The item of interest is the “renderer string.” If it says “Software rasterizer,” then your system is emulating OpenGL instead of using hardware acceleration. Here is some more documentation on how to check your setup using glxinfo.

Some definitions

  • OpenGL is a standard specification for writing applications that produce 2D and 3D computer graphics. Basically, it is an API.
  • Mesa 3D is an open source implementation of OpenGL, providing the library that applications can call into.
  • Direct rendering interface (DRI) are drivers that Mesa uses to translate OpenGL function calls into GPU-instructions.

When the DRI is present, this would constitute hardware acceleration. It has a userspace component and a kernel space component, which is the direct rendering manager (DRM)

The “driver” that is specified in xorg.conf is actually a relatively basic driver that performs the 2D tasks, including compositing and video acceleration. All 3D calls are passed on to Mesa. See the section about DDX (Display Driver for X) in Linux Graphics Driver Stack Explained.

Kernel Mode Setting (KMS) is the notion that the code to set the video card’s mode is moved into the kernel. The mode is the color depth and resolution of a monitor. Previously, the mode setting code resided in the X server. In the new scheme, it resides in the kernel. This provides the following advantages, as given in Debian 6 Release Notes:

  • More reliable suspend and resume
  • Ability to use graphics devices without X
  • Faster VT switch
  • Native mode text console

Tools for syncing

Here’s the situation: I have accounts on multiple computers. Who doesn’t have this problem these days? (If you’re in the top 1% of the world’s richest who own a computer, that is.) I have a netbook running Xubuntu, a desktop triple booting Ubuntu, Debian unstable, and Windows Vista, and several accounts at school. I want to be able to sit at any one of these computers and be as productive as possible.

My solution has several parts to it. For me to be productive, I want to have access to several different kinds of information, including:

  • bookmarks
  • email, including contacts
  • documents

For each kind of information, I have a different way of accessing it, depending on the level of configuration I can perform on the particular computer I am using.

Bookmarks

I store my bookmarks on Google Bookmarks. Google bookmarks has a web interface for accessing and managing bookmarks. Bookmarks are stored by URL, so the URL is not editable except by deleting and creating a new bookmark. Otherwise, I can edit the title of the page, and tag the bookmark to organize it how I please.

The first software tool I used to access Google Bookmarks was GMarks. (GMarks is free software.) GMarks is a Firefox extension, so I can install it on any account where I have access to Firefox. Thankfully my school has the Firefox web browser on their lab computers, and they allow students to add their own extensions. GMarks adds a menu to the toolbar with bookmarks pulled from Google Bookmarks. The bookmark tags or labels are used to generate the menu, with the ‘>’ character used to represent subfolders. I prefer to sort my bookmarks by date, so the most recently added ones appear near the top.

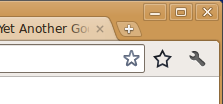
More recently I have been using Google Chrome for my web browsing. The software tool I use in this browser is Yet Another Google Bookmarks Extension (YAGBE). As this tool is not free software, I am in the market for a replacement that behaves similarly. YAGBE adds a star to the toolbar next to the URL bar. (This is to the right of the star that is already in the URL bar, which is for Chrome Bookmarks.) This is handy, and a little more compact than the default GMarks behavior. The star turns yellow when you are on a page which you have already bookmarked. Clicking the star reveals a menu with your bookmarks.

Screenshot of the star that YAGBE puts in the toolbar

Email

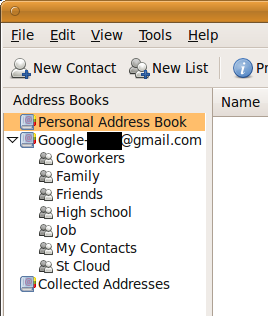
The obvious solution to email is to use a provider with IMAP access. I prefer to use a native client to a web client where possible. I use Thunderbird on the machines I administer, and on the school lab computers, I have configured Outlook to interface with my personal email as well as my school email.

The more interesting part is contacts. At some point I got fed up with all my Thunderbird instances pulling their own contacts into the “Collected Addresses” list. I was also fed up with searching my email inbox to confirm a particular email address for one of my friends. I decided to use Google Contacts (part of gmail) to store all the email addresses for my contacts. Similar to tags, Google allows you to add a contact to multiple groups.

There is a Thunderbird extension called (you guessed it) Google Contacts. This extension is free software. If you set up your Gmail account in Thunderbird for email, it will automatically use your username and password to pull in your contacts and add them as another address book. All of the groups from Gmail are created as Thunderbird Mailing Lists, so you can use them to find a contact if you desire. Otherwise, it behaves like the other address books, so you can use autocomplete.

Screenshot of the Google Contacts address book in Thunderbird

Documents

For my documents, I simply use Dropbox. (This is not free software.) On computers where I can install it, I do. When I cannot, I use their web interface to get the files I need.

In some situations, I’ll make an exception, and put a document on Google Documents so other people can edit it. I have also used Zoho Notebook to create a paged log of my computer hacking adventures. This allows me to edit the same notebook from whichever computer is running, which is usually not the same as the one that is being experimented on!

A Linux OS for my Eee PC

Two years ago I purchased an Eee PC 900 with a 16GB SSD and Windows XP. I left Windows XP on it and installed Eeebuntu 3.0. At this point I don’t remember if I installed Base or Standard. The Eeebuntu people became the Aurora OS people, and they have not released a stable OS since Eeebuntu 3.0.

Eeebuntu 3.0 is based on Ubuntu Jaunty 9.04, and support for Jaunty recently ended, so I will not be able to get security updates for it. To top it off, Google Chrome realized this, and has been complaining to me that my operating system is obsolete.

Windows XP itself is a bit old, and I don’t use it anyway. I decided to wipe out the entire hard drive and install a new operating system. I picked Xubuntu to try out first. I downloaded the Xubuntu ISO and used Ubuntu’s Startup Disk Creator tool to put it on a usb stick.

Backing up

I booted Xubuntu and used the command line to backup using an external hard drive with enough free space for a 16GB image of the entire Eee PC disk.

First, identify the name of the hard drive:

sudo fdisk -l

Then I ran the following command to backup the hard drive:

time sudo dd if=/dev/sda of=/media/ubuntu-backup/home/bobby/eeepcharddisk-20110620.dd
31522176+0 records in
31522176+0 records out
16139354112 bytes (16 GB) copied, 642.54 s, 25.1 MB/s

real    10m43.059s
user    0m40.083s
sys     5m36.741s

Installing Xubuntu

I used the shortcut on the desktop to start the installation.